
Sometimes you look back in history and say to yourself, if I was there I would have… Sheltered Jews, Protected Japanese neighbors’ property, Befriended the only black children in the school… This history, being made right now, is our chance to be on the right side of justice, to be the citizens we will wish we had been and to make our children proud when we tell them what we did when democratic institutions were burning.
In 2017 this is the kind of wall I want. It’s cheaper than a border wall. It fights climate change. It pays for itself. And it’s made in the USA!
After several years of planning we are adding insulation to the outside of our walls. Since our house, like most houses in the US, has 4″ walls, there isn’t much room to work with when it comes to insulating. For more than 4″ of insulation we need to take space on the inside of the wall or on the outside. Obvious disadvantages of adding insulation to the inside: very expensive to restore the finishes; we’re living here and don’t want to deal with construction mess/displacement; makes the rooms smaller. Obvious advantage of adding insulation to the outside: chance to replace the 60+ year-old siding that was damaged when we had the walls densepacked. Other pros and cons are not listed here, but suffice it to say that these were the compelling factors
Why even bother? As Nik has pointed out more than once, we’re already providing all our household energy with our solar system (and about a cord of wood a year – which you can count under the zero energy column or not per your attitude toward the renewability and sustainability of burning wood). If we “save” energy by becoming more efficient, we’re not going to save any money, and we’re not even going to reduce pollution/forestall climate change. What are we gaining by making our home better insulated? Comfort! What I have pointed out more than once is this home is the worst kind of zero energy home: uncomfortable. Because heat is provided only in the dining room, parts of the house far from the mini-split or woodstove are cooler than the core of the house. The colder the weather, the cooler the bedrooms until it gets fully cold in our bedroom and bathroom. I’ve seen it below 50 deg F in our bathroom: time to shower at the gym.
The design of the new wall is, in my opinion, an improvement on every thickened-wall strategy I’ve seen, even the cherished Larson Truss. Nonetheless, it’s not really what I wanted. One of my objectives was to design a foam-free wall because spray foam is dangerous for the installer and is made with chemicals that contribute to climate change. My wall has a little bit of foam in it. I also wanted to leave the original siding in place so as to not disturb the lead paint. Got talked out of that because it makes the construction easier to have the old siding out of the way. Here’s what makes it a superior way to add insulation to the walls in an existing home:
- minimal foam
- faster to assemble than Larson Truss
- good structural design
- relatively few expensive fasteners
- nailbase
- easy to hang windows and trim
Step One – Our awesome builder, Ed, removed all the siding on two walls by himself in two days (including cleanup and disposal). He also framed in the opening for the larger windows that will go on the south side. We were able to check in on the densepack job that was done four years ago. From what we saw, good fill but not that dense. You can also see there was a narrow bay that was missed entirely.
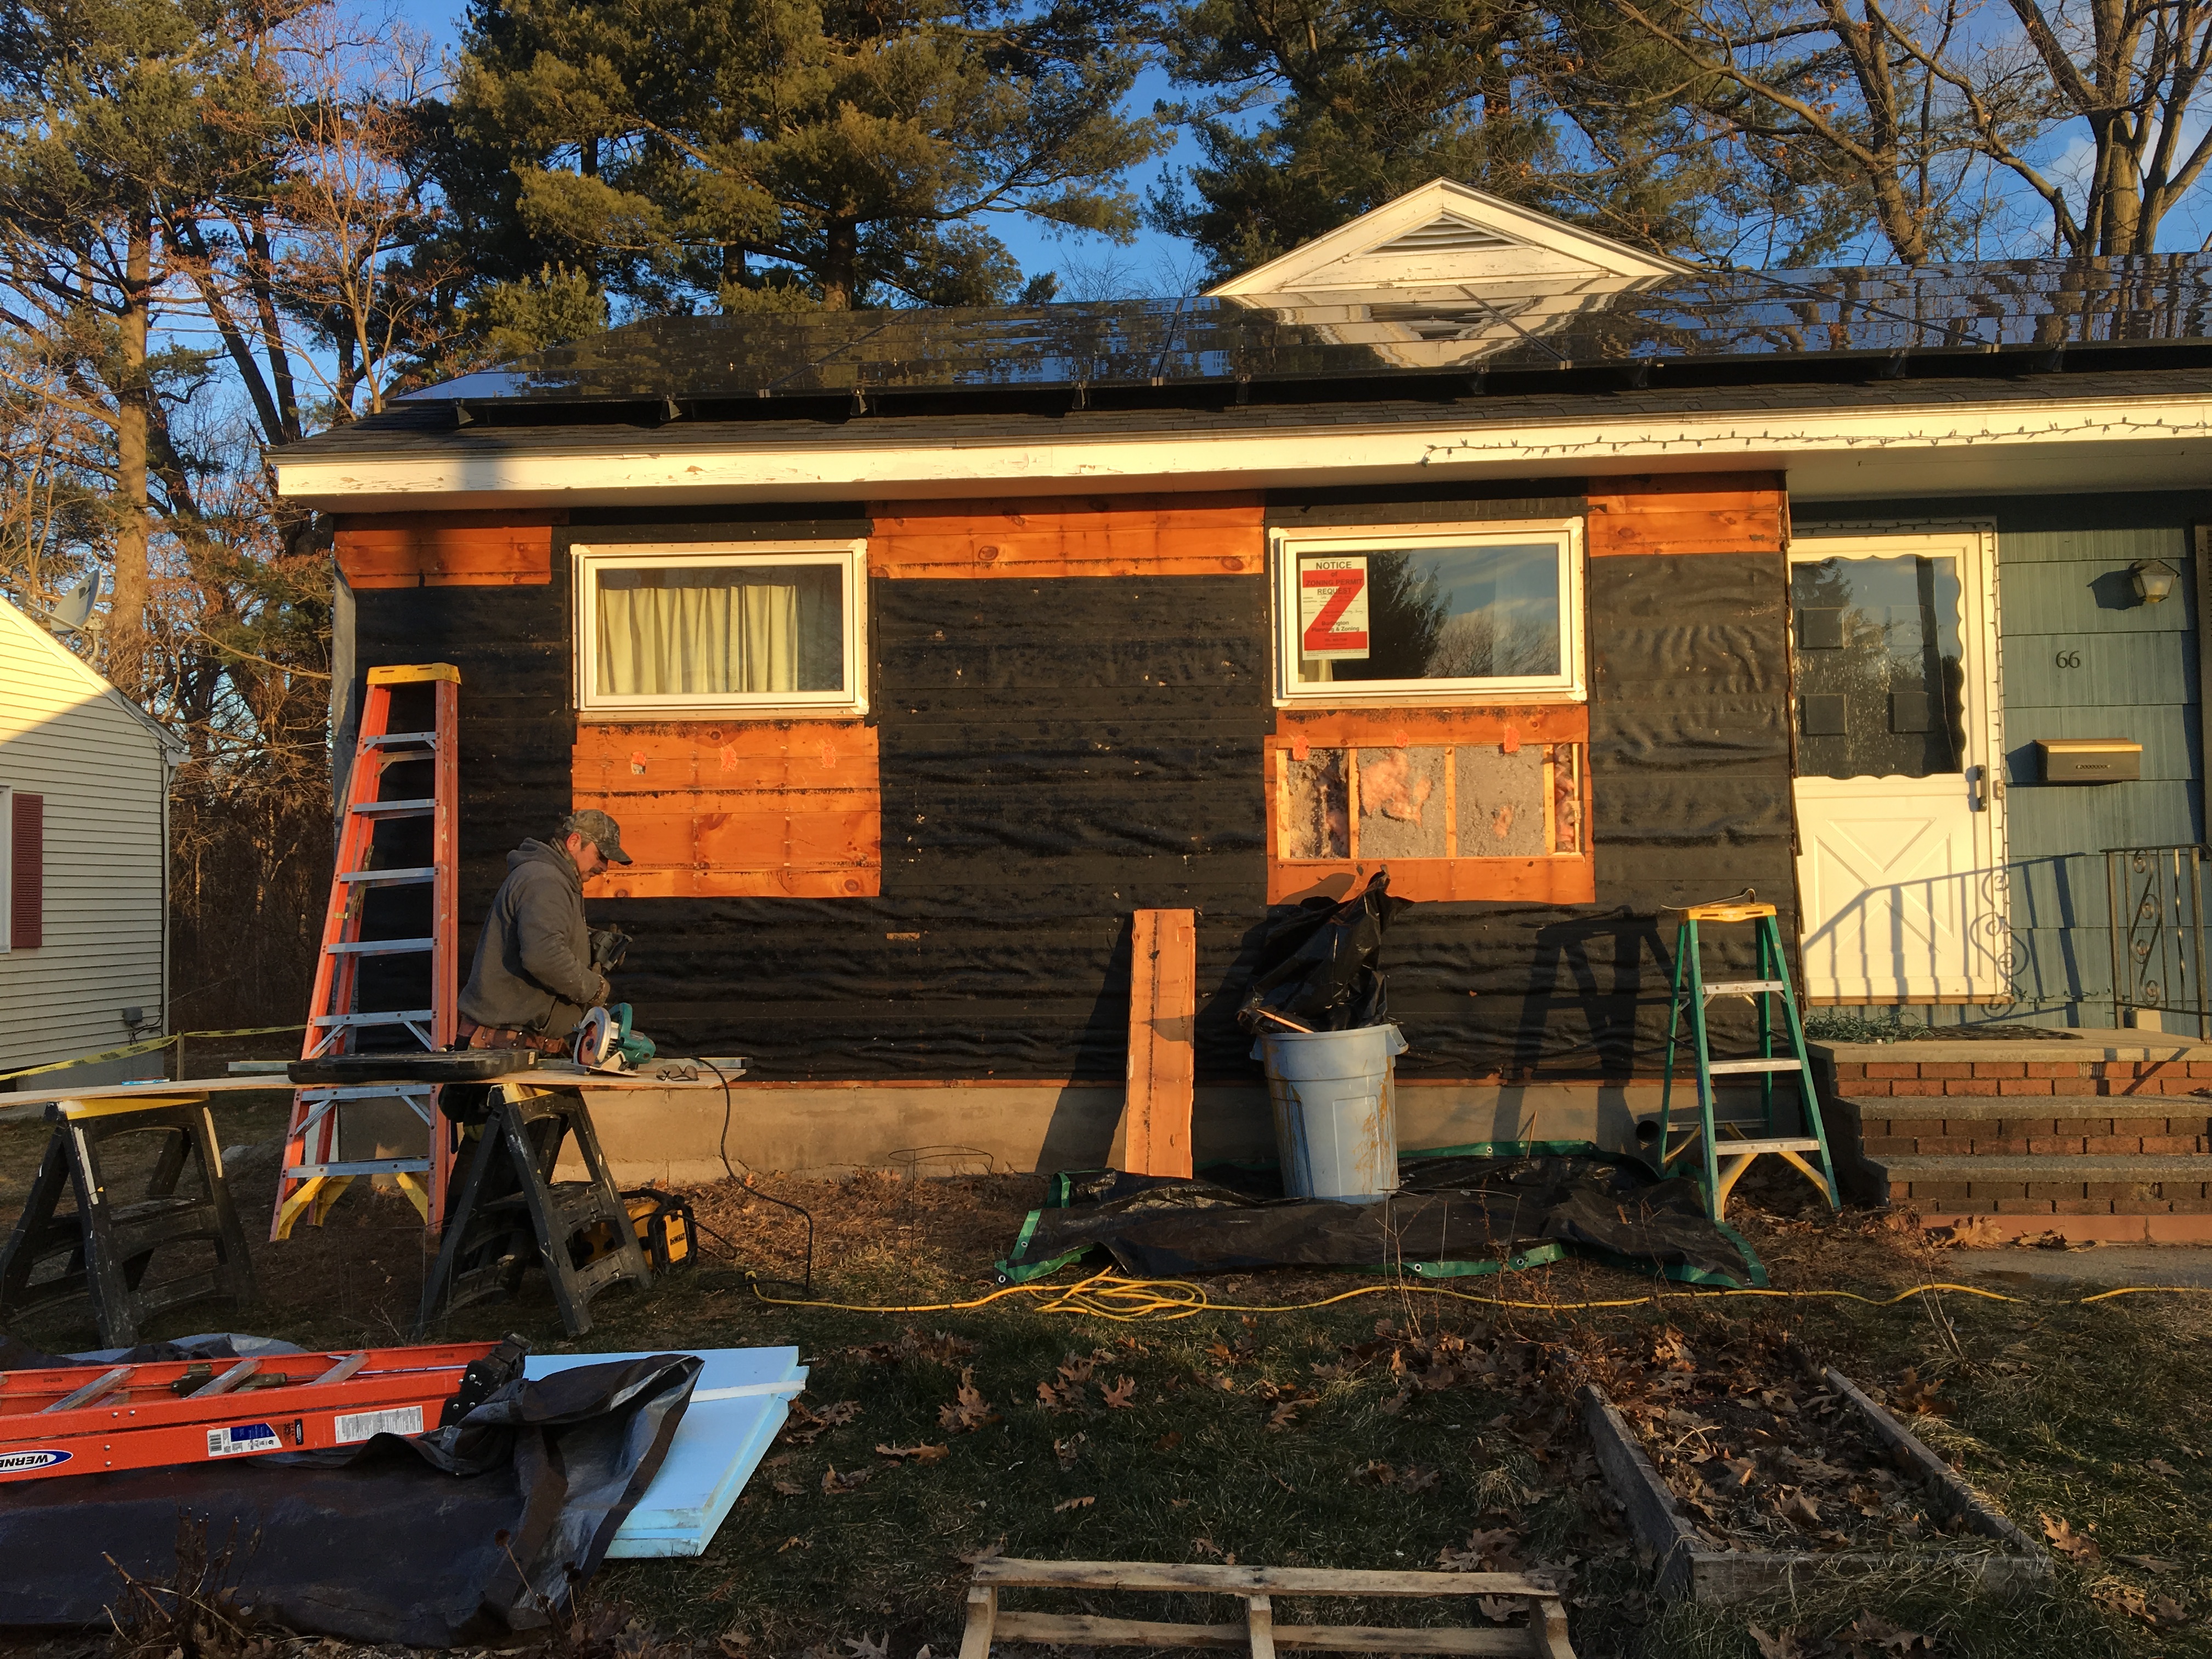
The windows on the south side of the house will be enlarged to let the bedrooms load up on solar heat in the winter and to provide egress. Sheathing removed shows the cellulose that was added to the walls a few years ago and the fiberglass batt that originally insulated the house.
Step Two – Ledgers are mounted on the wall. An inch-and-a-half of polystyrene foam board is behind the ledger to provide a continuous insulation layer and make even more space for insulation. Originally I asked for a 2X8 to be added to the wall, but with this 1.5″ of foam board behind the ledgers only a 2X6 is needed – saving trees! The ledgers are attached with very long screws through to the structural 2X4 in the original wall. These are the only long screws required in the whole assembly.

After the siding is removed ledgers are mounted to wall with 1.5″ of rigid foam board as a spacer.
Step Three – New studs are notched to hang on the ledgers. This makes a super strong wall with minimal fasteners, and no time spent assembling trusses. On the gable end a small shed roof is constructed to cap the new wall. One thing I really like about this little roof is it keeps water off the wall, which will help the paint last longer and make sure the windows never leak.

The walls have been thickened out with a 2X6 spaced off the wall by 1.5″. The two eaves have been connected with a tiny shed roof to cover the thickened wall. Here you can see the tar paper that was behind the siding, but this paper will be removed so the spray foam can adhere directly to the sheathing.
Step Four – At this point work on the wall is stopped while some excavation happens. The basement under this part of the house is finished with nice knotty pine boards that I don’t want to remove, so we had the foundation wall dug out and insulated on the outside (4″ of extruded polystyrene – R-20). Ed designed the whole thing so the foundation insulation would butt up- and get glued to the foam board behind the lower ledger. We’re also enlarging two windows in the basement for egress and to improve daylighting down there. Ed cut out the foundation wall and framed in the new window to be flush with the outside of the foundation insulation.

Foundation insulation on the outside keeps the basement walls nice and warm, avoiding summertime condensation. The pink insulation aligns nicely with the blue insulation peeking out behind the lower ledger.
Step Five – One inch of high density spray foam is applied to the original sheathing of the house: behind studs and over ledgers. This air seals the wall and provides a vapor diffusion retarder. To keep moisture inside the house from working its way out to the new sheathing this layer should be 2″. But I wanted to keep foam to a minimum and I’m pretty sure there’s oil paint on the inside of the walls, and that will do a pretty good job of keeping moisture out of the walls. By all rights this should be attended to seriously, but this is my house and I’m willing to take the risk because I think it’s quite low given the whole wall assembly. I also know that I will keep humidity inside the house under control. There are a lot of things that contribute to whether or not a wall manages moisture well and I feel good about this design. In other circumstances, 2″ of high density spray foam is smart.

Spray foam on walls gets between the studs and the old sheathing, making sure the insulation is not interrupted anywhere. At this point in the construction the house has suddenly gotten much more air tight. It’s been warm, but I’m expecting to really tell the difference during the next cold snap.
The original sheathing on the house is 3/4″ planks. Gaps have opened up between the planks as they have shrunk, so the spray foam is making a big difference in the air tightness of the wall. There’s a lot of chatter about where this air tight layer should be in a thick wall. Having it in the middle, with insulation to the inside and the outside, is a little unusual, but I think it’s the best place. All the insulation to the outside of the original plank sheathing keeps it warm so it won’t support condensation in cold weather. Applying an air barrier and vapor diffusion retarder at that surface keeps moisture from getting into the outer wall and that avoids condensation on the outer sheathing. I had wanted the air barrier and vapor diffusion retarder to be a peel-and-stick membrane (like Grace Ice and Water Shield), but because of the irregularity of the plank sheathing my builder wasn’t comfortable with that. And that’s how I ended up with foam in the wall.
Step Six – Time to make a mess inside. Windows are removed from the original wall and replaced to the outside of the new wall. The windows were new about 15 years ago and they’re pretty nice. We’re keeping them except in the places where the windows are being enlarged for more sunlight and egress. OSB sheathing is installed all over the wall. The space behind the OSB is 7″ (5.5″ for the “studs” and 1.5″ for the foam board; the ledger is notched into the “studs” so it doesn’t add any thickness). The remaining space is filled with cellulose, so total insulation is 1″ spray foam + 6″ cellulose = R-28.
All the rest is siding and trim. Lots of folks want to know how much this is costing, and is it “worth” it. I won’t know total cost for a while, but I’m guessing about $30,000. We could have gotten another heat pump for less than $6000. But we wouldn’t have new siding out of that, or egress windows in the bedrooms, or a warmer basement… How much is comfort worth? And how comfortable will the bedrooms really be? Time will tell. Even Nik, with his preference for mechanical solutions, admits that he can feel a difference in the bedroom, and I think I detect a note of appreciation. We’re only insulating two walls: the ones furthest from the mini-split and woodstove. That keeps cost down and focuses our efforts where we need to improve comfort. So, worth it..? I know some would say no. For me, there are benefits that can’t be monetized, and obviously my answer is yes to the wall.

Leave a comment