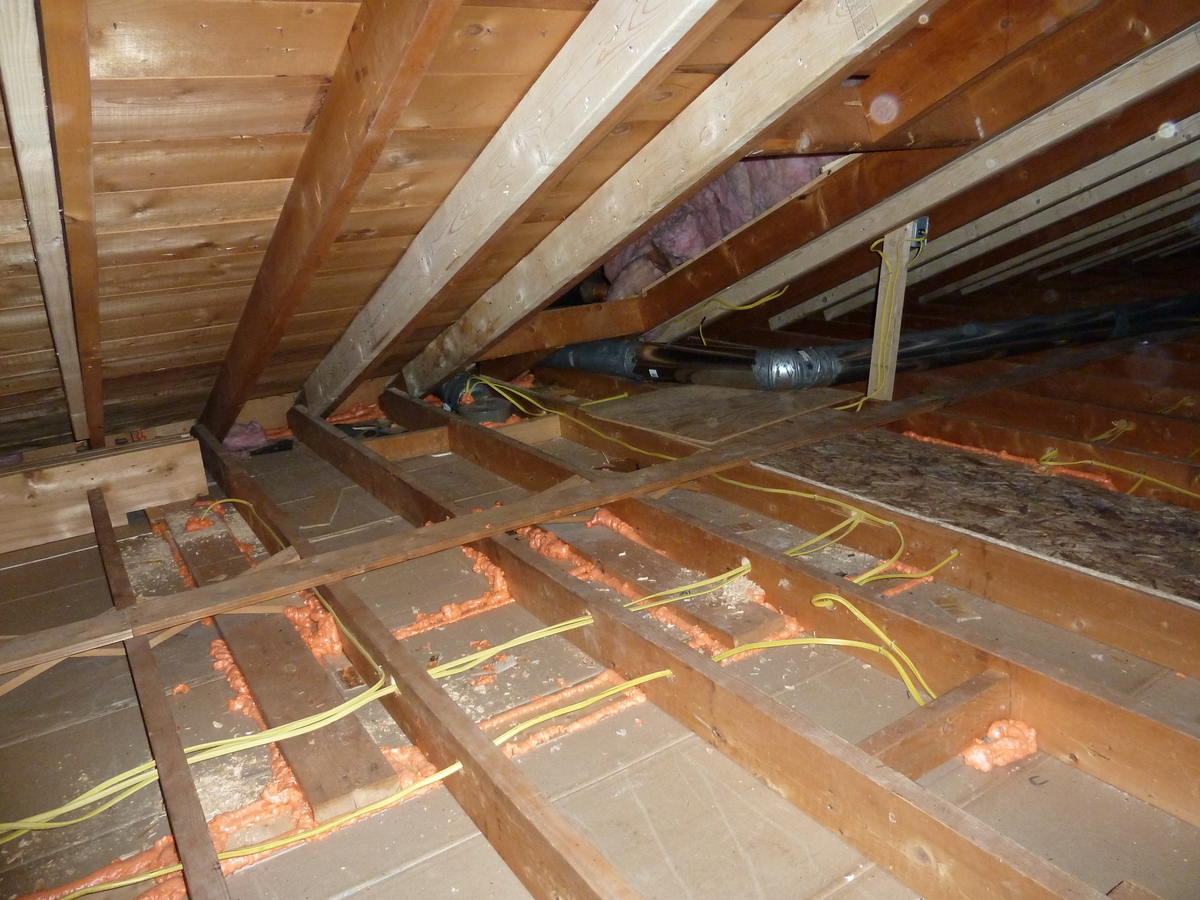
Last we talked about the attic, I was finding little vermiculite pebbles in nooks and crannies all over the attic. I’m over it. Our vermiculite remediation contractor did the best he could. For the most part we were able to work in the attic without vermiculite exposure. My advice to you, if you have vermiculite in your home and are considering having it removed, is to not let the perfect be the enemy of the good. Some homes can benefit a lot from vermiculite removal. If that’s your home, take the nearly-perfect job these contractors can provide and get on with the efficiency work. If you are looking for a 100% vermiculite-free home for your several-thousand-dollar remediation job, you’re going to be disappointed.
Making the inside of the house a different temperature from outdoors creates a pressure difference between inside and out. The pressure causes air to move through holes and cracks of any size. Even a hairline crack can leak all season long. Uncontrolled leakage is the biggest cause of heat loss. To save energy and keep the house comfortable, seal all holes and cracks, no matter how small. Here one-part spray foam seals the crack between the ceiling drywall and the top plates of the partition walls.
Since we closed on the home, and removed the vermiculite, in mid-Spring, our plan was to have the attic reinsulated as quickly as possible so as to not get into the heat of the summer with an uninsulated attic. Suffice it to say we did not accomplish this and suffered through a very hot, uncomfortable first summer in our new home. What prevented us from insulating the attic? The ventilation system, adding lights to the living room and kitchen, updating the wiring to the main level, building the truss wall in the garage: all topics for another post.
When we were finally ready to insulate, here’s what we did:
Step One: Air seal every hole and juncture between different materials. We used one-part spray foam for most of this seal work. In one place I used some cardboard. And under the lowest part of the roof, the “eave”, I used two-part spray foam, which is applied with a smaller gun and expands more, so I didn’t have to be so fussy about where I squirted the foam. In order to gain access to the attic under the eave, we had Nik’s solar crew remove the soffit while they had staging set up to install the solar panels.
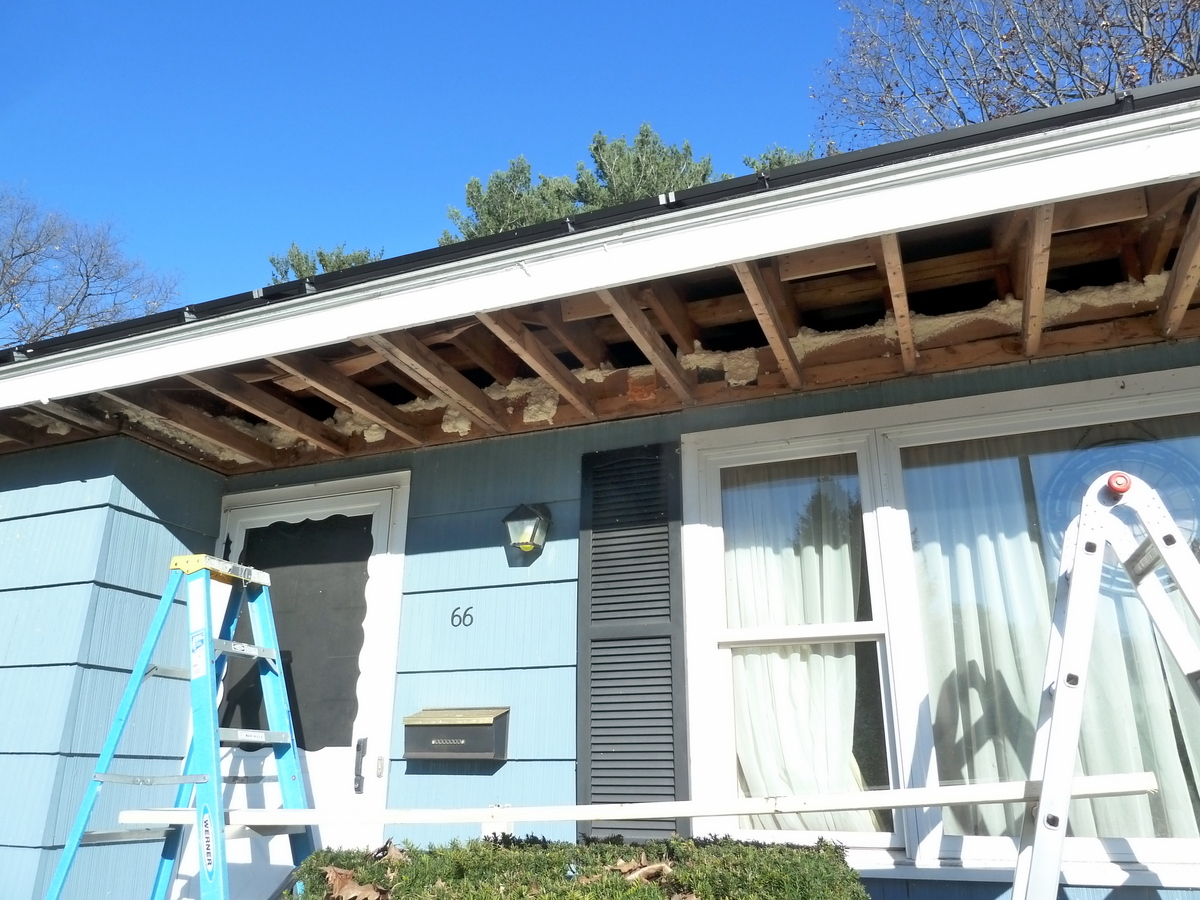
The part under the roof overhang is called the soffit. This area is pretty much inaccessible from the attic because the roof comes down so low to the ceiling. In order to air seal the top of the wall we removed the soffit from the outside. The white root beer float-looking stuff is two part spray foam which I applied to the top of the wall (in the attic) so that little cracks and holes in the top of the wall would not leak into the attic.
Step Two: (Re)move all the fiberglass batts in the attic of the addition. This attic was not remediated because there wasn’t (very much) vermiculite in that attic. I’m opposed to landfilling fiberglass batts, even if you don’t want them (which I don’t), so I just moved them to the side while I air sealed, and then put them back on top of the new insulation after the attic was done.
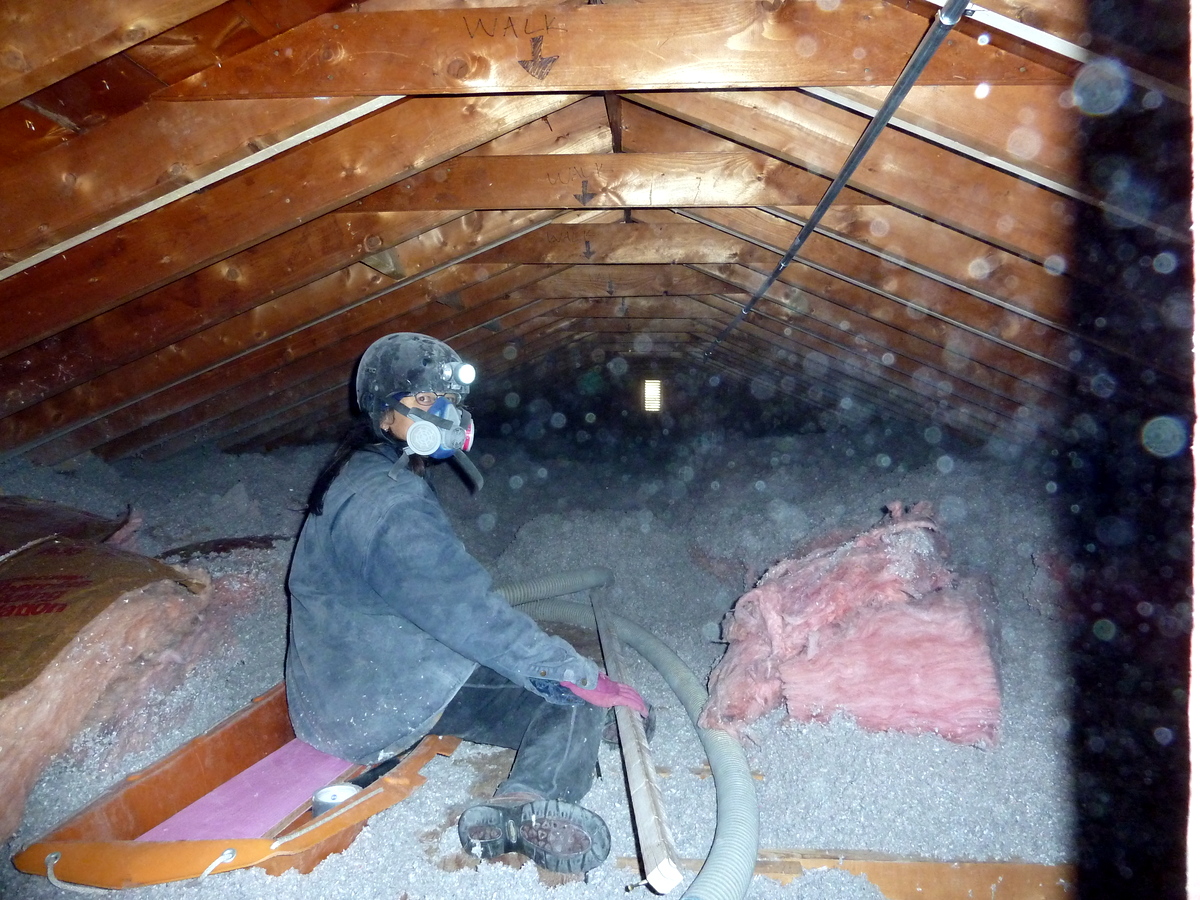
The pink fiberglass batt is being buried in the cellulose. I don’t want the batt on the attic floor because it will prevent the cellulose from conforming to the framing and wires, and I don’t want it on top because I can’t get the batts to sit tightly against each other. So, I blew a layer of cellulose, put the batt on top, then blew more cellulose, which filled the spaces around the batt. I had hoped adding fiberglass batts into insulation would reduce the amount of cellulose I needed to install, but I ended up using 221 bails.
Step Three: Blow about 3′ of cellulose on the attic floor. Cellulose is primarily finely-chopped newspaper. It settles onto the irregularities of the attic floor: framing, wiring, ducts, electrical boxes, what-all, and does a great job keeping attic temperatures and house temperatures separate. Unlike fiberglass, cellulose also does a good job blocking infrared radiation, so it’s an especially good insulator for the summer.
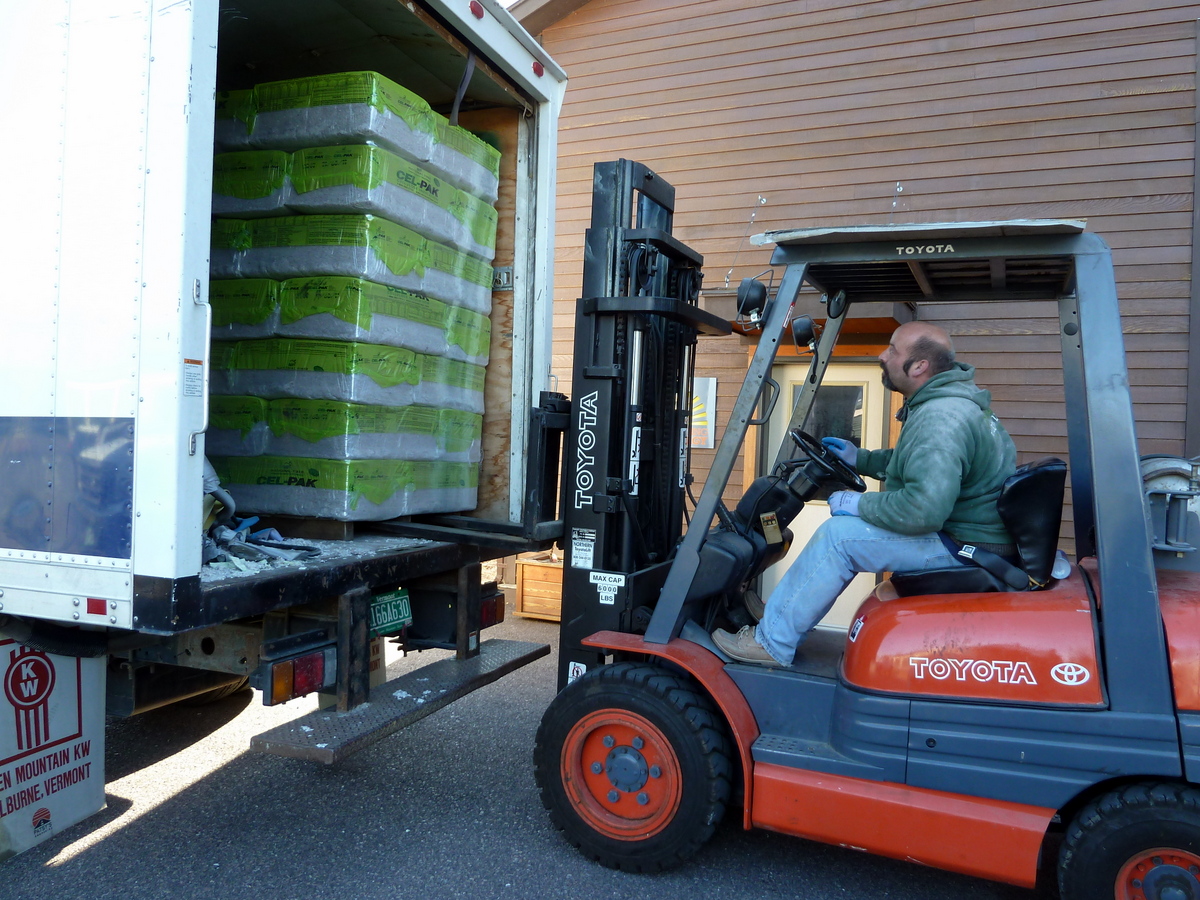
I estimated the materials for the job by figuring the surface area of the ceiling, mulitplying by the thickness I wanted, adding in the amount for the garage wall, and looking up the coverage for the product we ordered. It turned out to be a lot more insulation than I expected. We filled the truck once, and had to go back to Nik’s shop in the middle of the day and load up the remaining bails.
Three feet is a lot of cellulose compared to what most folks put in their attics, and of course I couldn’t really get three feet of cellulose everywhere, since the roof comes down to within about 6″ of the ceiling at the eaves. But I don’t think that amount of insulation is unjustified. First of all, cellulose is relatively inexpensive, secondly, the attic is the one part of the house where we can put a huge amount of insulation without creating ridiculously thick building assemblies, and finally we don’t want any heat loss, so more insulation is better.
I insulated the garage truss wall at the same time as the attic, so when I estimated materials I included that. All told, I expected to use 208 bails of cellulose.
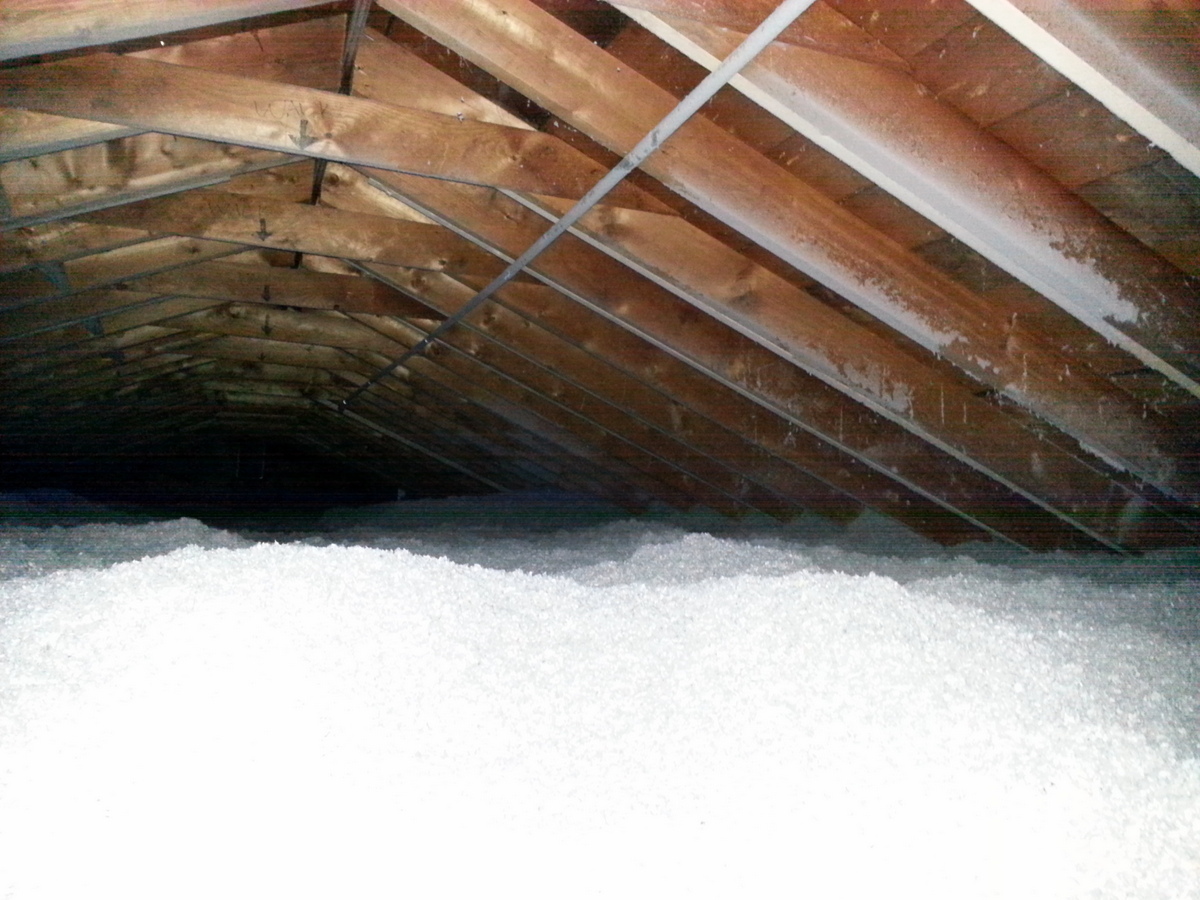
This is what the attic looks like now. Nothing to see. The conduit on the rafters was installed by Nik before the attic got insulated. He’s planning for future solar on our east-facing roof and wanted to be able to get the wiring back to the inverters without having to wade through the cellulose.
Step Four: Never go back in the attic. As you can see from the photos, there’s not much left of the attic. All the wiring and ductwork in the attic is well-buried under the cellulose, as is the walkway. The only thing in the attic that needs service is the ventilation fan, and hopefully we won’t need to do anything with that for about 15 years. Contrary to popular opinion, the attic is NOT for storing stuff.
We weren’t finished insulating the attic until some time in November. In addition to a very hot summer, we then had a chilly Autumn during which we burned a heckuva lot of wood. Now our house has a thick cellulose hat, and there’s nothing about the attic insulation that will ever need to be repaired, replaced or increased. Attic – done!

So much for step four. Because I want to remove some of the walls in the house to open up the small living room and narrow hallway, we had to reroute some wiring. Unfortunately, the first wall I want to remove is the wall Nik used to run new wiring to the ceiling fixtures. Because I set us up for this with bad planning I bravely volunteered to go in the attic and pull the wires.
It was much harder than I thought it would be because there is so much insulation up there (three feet!) that it’s hard to find a place to put the stuff you need to move aside. It’s tempting to just make a little bare spot where you’re working, but with three feet of cellulose all around your bare spot, any move you make collapses handfuls of cellulose onto your working area. Tracing the wires, under normal circumstances a simple job of just looking at the wires, was also unbelievably difficult. I had to crawl, on top of ceiling joists through three feet of cellulose, with one hand around a wire I couldn’t see. If I let go of the wire and couldn’t find it again I had to go back to the beginning and start again.
Ah, I’m getting whiney. But let this be a warning to you all. Plan ahead. Yes, it took us a long time to get the attic insulated, but we should have taken another week and thought about future work down in the house that will require work in the attic.
So, that’s it for the attic, right? No. There is another wall that I’ll ultimately want to remove, and that wall has three switches and four outlets, plus we’ll need to put a beam in the attic because right now that wall is holding up our ceiling joists. For that work I think I’ll get a leaf blower to help move the cellulose aside and put it back.
By: lilingy on December 21, 2013
at 6:54 am
After performing a proper air seal you have created a great air Barrier to the point a inferior product such as cellulose would not be needed. Loose fill fiberglass for example John mainville is gaurenteed to never settle and never deteriate . It’s 100% from aldehyde free and is a true green guard product . Good luck in 5 to 10 years when you cellulose settles bellow the joists . Before your money goes call the pros
By: John on January 10, 2017
at 7:10 pm
Hi John. Welcome to the Energy Freakshow. With three feet of cellulose in the attic we’re not worried about settling. As for the greenness of blown fiberglass versus cellulose I prefer cellulose as a recycled product with low embodied energy. There is a place for blown fiberglass but my attic isn’t the place.
Thanks for reading. Looking forward to any other thoughtful comments.
By: Li Ling Young on January 10, 2017
at 8:48 pm